artisJet Golf ball print solution

Direct to print golf ball directly

artisjet small UV LED printer is the ideal machines for customizing golf balls and golf tee with your clients’ logos. They allow you to print delivers any photo, image, letters, logos and pictures onto Golf ball directly. It has good durability and abrasion.

Home based and start-up businesses

ArtisJet customized golf ball printer can help you capture the small orders, like company logos, souvenir for celebrating an event or occasion, family and friends customized balls. Etc, as well as batch printing up to thousands of balls.

standard golf fixtures/jig

Businesses print ArtisJet customized Golf ball inkjet printer adopts gorgeous and colorful ink system, and unique designed standard golf fixtures/jig, allows print high quality pictures, logos and text directly on multiple golf balls at one time.

Rich yet sharp color performances

Empowered by the piezo print technology and anti-static print systems, artisJet custom golf ball print solution delivers the colors onto the golf balls in photo quality and highest sharpness.

Glitter print result on demand

Equipped with latest DTS3 Varnish ink, artisJet printers support the clear printing to enhance the performances of the printed products on demand.

Fast production speed at low cost

Custom wood printing is a click of print. By importing the files into the artisRIP, the products will be ready in few minutes.

Mimaki launches small-format direct-to-shape digital printer

Increasing demand for the rapid roll-out of high-mix and low-volume printing has led Mimaki to launch a direct-to-shape industrial small-format LED UV inkjet flatbed printer.

mimaki-ujf-715plus

The UJF-7151plus has a maximum printable size of 710x510mm

The UJF-7151plus on-demand, industrial, small-format system for screen printers aims to improve accuracy, consistency and reliability by modifying the mechanical structure of the print table.

The digital kit, with a maximum printable area of 710x510mm, boasts fine lines, edges and small text and enables users to double-layer print and colour on a white base layer, according to Mimaki.

Hybrid sales manager Stuart Cole said the cost of the kit, due on the market late this year, was being finalised but the speed of 3.3m/hr was “massively faster” than other small-format machines.

“It’s unlike other UJF models, which are desktop, bench-mounted machines. The 7151plus is floor-mounted and more industrial in touch and feel,” said Cole.

“Instead of the bridge assembly moving back and forth, with this machine the bed itself moves and the machine stays static. It is more robust and offers precision.

“Print quality is up again, there are more printheads – six in total – so it’s faster. And it has large ink volumes so it is more cost-effective.”

Cole, who described the printer as an “entrepreneurial machine” said that, though targeted at screen printers, the applications for the printer were so diverse it could not be pigeonholed.

It can also be used by engineering companies for printing on control panels, switches and alarm-bell covers thanks to its quality and accuracy, he said.

Mimaki general manager for marketing Mike Horsten said there is more demand for digital, on-demand and plateless inkjet print because of its ability to quickly provide high-mix, low-volume printing.

“The high-performance UV inkjet printer UJF-7151plus enables high-precision dot placement and beautiful printing at top-level productivity. The market is growing.”

Daily operation is enhanced by MFD1 dithering technology that processes image data, while an improved advanced pass (MAPS4) reduces banding and uneven colour printing.

A continuous ink circulation system aids uninterrupted printing and reduces waste by helping stop ink sedimentation and clogged nozzles: a nozzle check unit detects and cleans the clogged nozzles.

More key features of the UJF-7151plus include a mechanical structure for high-precision printing and superior print-image quality control technology. The six staggered printheads improve speed and productivity.

The UJF-7151plus will be available through the specialist reseller network of exclusive UK and Irish Mimaki distributor, Hybrid Services, from November.

Cole added: “The UJF-7151plus combines peerless print quality with excellent productivity. Its distinctive size, industrial design – including the larger one-litre ink bottles – along with cutting-edge features sets it apart.”

The Mimaki UJF-7151plus will be on display at the Viscom Italia, Viscom Düsseldorf and Inprint exhibitions across Europe throughout the autumn.

Carlsberg asks print industry for more help going green

A year or so ago the Carlsberg Circular Community (CCC) announced a project to develop next generation packaging materials optimised for recycling and reuse.

The CCC is Carlsberg plus a collection of its global suppliers and they have now announced that they are working on a biodegradable and refillable drinks bottle.

The Green Fibre Bottle, including the cap, is to be made entirely of sustainably sourced wood fibre and will be developed over the next three years. The project is estimated to cost €1.43 million with 60% coming from the Business Innovation Fund in Denmark.

Unlike glass which can be recycled but which can take a million years to eventually biodegrade, the new material will be readily biodegradable once the package reaches end of life. The Green Fibre Bottle reduces Carlsberg’s need to use primary materials in its drinks packaging, because the bottle is made from waste paper pulp.

The project is part of a larger puzzle for Carlsberg, which is actively encouraging upcycling. Upcycling uses waste materials as the input for new stuff, for instance using old tyres for flipflops or waste paper for containers.

Carlsberg’s Green Fibre bottle project

Carlsberg’s partners in the CCC project includes providers of cans, glass bottle coatings and packaging, paperboard multipacks and PET kegs for draught beer. One of them is EcoXpac a developer of customised protective packaging based on biodegradable moulded fibre which is taking the lead in creating the Green Fibre Bottle.

Reducing dependence on primary materials is a core principle for a rising number of consumer product companies. In packaging it means coming up with new ideas and approaches to packaging product development, refurbishment and remanufacturing.

In the print production sector companies such as Ricoh and HP have been doing this for years with hardware and ink cartridges. But this is more about reusing parts that have not reached their end of life. Carlsberg is putting into place a comprehensive programme to use waste and turn it into something useful that will eventually biodegrade, the ultimate cradle-to-grave scenario.

Carlsberg’s journey is to develop and market new products that support a circular, zero-waste economy using its Cradle-to-Cradle business platform within the CCC. There are now eight partners in the group and Carlsberg wants to have fifteen by 2016.

Cradle-to-Cradle – the methodolgy to create a sustainable manufacturing cycle across the process, was created by Professor Michael Braungart and Mr. William McDonough with their companies EPEA Internationale Umweltforschung GmbH and MBDC, LLC

And while there are packaging manufacturers, there are no packaging printers in the group just yet but Carlsberg is open to encouraging them to join. They are looking for partners with a shared vision of eliminating the concept of waste, and who can help Carlsberg to reduce the business’s resource impact.

Carlsberg claim that the Green Fibre Bottle is fully compliant with food and beverage regulations and that it is strong and durable. It’s early days but Carlsberg hopes to have a viable product by 2018.

How to print multi golf balls one time with jig

Preparatory work & Necessary materials

  • Many golf balls
  • Make sure the printer is working properly and connected to the computer and powered on.
  • Golf ball jig from BrotherJet
  • ADOBE Photoshop & Brotherjet AritsRIP 8.3 RIP software has been installed in your computer and they are working properly.

Three steps to make a printing template, It easily!

1. Open the 1# template file “CD disk:\EPS FILE\GOLF 30-40 CM_ONE.EPS” with photoshop, The file you can get in the BrotherJet RIP software and tolls cd disk. In Photoshop, use the File –> Place command to put image file you want to print on golf balls into the new layer in edition template.

Adjust the image size and position to move it to the centre of circular pattern.Make sure the image size does not exceed the circular pattern range.

golf ball print template 1

Hide the “Layer 0″  layer, Use the Edit –> Define Pattern command to create a Pattern you can give a name like “GOLF_PRINT_IMG”.

golf ball print template 11

2. Open the 2# template file “CD disk:\EPS FILE\GOLF 30-40 CM.EPS” with photoshop, The file you can get in the BrotherJet RIP software and tolls cd disk.

golf ball print template 2

Select “IMG_B” layer and Use the Edit –> Fill command, In the Fill dialog, set the contents to use “Pattern”. In Photoshop CS4 and later, make sure “Scripted Patterns” is not checked, (But do explore it later… it’s cool!). Select your custom pattern named “GOLF_PRINT_IMG” from Custom Pattern drop-down panel and click “ok”to fill the layer.

golf ball print template 2-1

Adjust the patterns position to centre of circular template pattern

golf ball printer template 2-2

3. Hide the “BACKGROUND” layer, please compose the file and save it as format JPG/EPS/TIF.

Printing position setting:

printing Coordinate:
1. By printing coordinate we can locate the printing position easily and accurately.
2. Open the coordinate file with the RIP software, set the output: X=0, Y=0, output size: width=33cm, the height with adjust automatically.(For the formula mode of the software there will be a little bit error between the actual size and the real pho to size.)

rip software set

printing position

3. Put the golf ball jig on the golf ball printer’s platform where the Jig photo/Coordinate is printed.

golf ball print jig

Start printing

1. Printing setup on the software.
1) Size and Position
1, Using typesetting files, we can print with high actual position.
2, Open the printing template file you create with photoshop by Rip software, set the output: X=1,Y=1, output position:Width=30CM, hight will adjust automatically.
(For the formula mode of the software there will be a little difference between the actual size and the real photo size)

2) Resolution and printer setting.

3) Ink Channel, Ink limit and CISS

2. Printing process
1, Backward the platform to the end, otherwise error report may happen.
2, Color printing set, as shown in the picture.
print set

golf ball printer

Let you know from the water based ink to uv ink

The factors that influence the printer in the decision-making process when purchasing a new ink technology also include price, durability, adhesion, colour brightness and coverage.  What’s more, the ink type must perfectly match the application you are looking to provide your customer.

Ink plays a key role in technology and the standard of print quality. Printers need the ink to deliver outstanding and consistent performances, with minimal disruption to the production floor.

Here we provide a lowdown on the key ink technologies:

Print technologies: An overview

Types
Colorants

Pigment inks are used more frequently than dyes because they are more color-fast, but they are also more expensive, less consistent in color, and have less of a color range than dyes.

Pigments

Pigments are solid, opaque particles suspended in ink to provide color.[1] Pigment molecules typically link together in crystalline structures that are 0.1–2 µm in size and comprise 5–30 percent of the ink volume.[1] Qualities such as hue, saturation, and lightness vary depending on the source and type of pigment.

Dyes

Dye-based inks are generally much stronger than pigment-based inks and can produce much more color of a given density per unit of mass. However, because dyes are dissolved in the liquid phase, they have a tendency to soak into paper, making the ink less efficient and potentially allowing the ink to bleed at the edges of an image.

To circumvent this problem, dye-based inks are made with solvents that dry rapidly or are used with quick-drying methods of printing, such as blowing hot air on the fresh print. Other methods include harder paper sizing and more specialized paper coatings. The latter is particularly suited to inks used in non-industrial settings (which must conform to tighter toxicity and emission controls), such as inkjet printer inks. Another technique involves coating the paper with a charged coating. If the dye has the opposite charge, it is attracted to and retained by this coating, while the solvent soaks into the paper. Cellulose, the wood-derived material most paper is made of, is naturally charged, and so a compound that complexes with both the dye and the paper’s surface aids retention at the surface. Such a compound is commonly used in ink-jet printing inks.

An additional advantage of dye-based ink systems is that the dye molecules can interact with other ink ingredients, potentially allowing greater benefit as compared to pigmented inks from optical brighteners and color-enhancing agents designed to increase the intensity and appearance of dyes.

A more recent development in dye-based inks are dyes that react with cellulose to permanently color the paper. Such inks are not affected by water,alcohol, and other solvents.[citation needed] As such, their use is recommended to prevent frauds that involve removing signatures, such as check washing. This kind of ink is most commonly found in gel inks and in certain fountain pen inks

Water based inks
If a printing business is looking to move into fine art and photo quality like products, dye or pigment based inks are generally used for these types of applications. Water carries the colourant in both inks, which comprises of tiny particles in dye inks.  Dye inks produce more detailed images with smooth tones and vibrant colour reproduction, but they are not water and UV light resistant. Therefore, they are mainly used for indoor environments and short term use in UV lighting.

Pigment inks have slightly bigger particles, are more stable in UV light and are water resistant. Their particles settle into the fibres of paper, canvas or similar substrates. Window displays, posters, pop-up or longer term promotional jobs, together with short term outdoor projects, are some of the possible applications that can be explored with pigmented inks. They can last for several months before fading, or even for some years if protected against sunlight.

Solvent Ink?
Simply put, solvent ink is a relatively inexpensive type of ink made to work in inkjet printers. In the world of ink the term solvent is used to mean any ink that is, in fact, not made with a water base.

Uses
Solvent ink’s greatest application is in the printing of products that are to be used outdoors because of its ability to adhere to non-absorbent materials. Solvent ink also has the advantages of being fade proof, water proof and scratch resistant. These qualities enhance its usefulness in outdoor printing.

Components
There are three parts to solvent ink: the carrier fluid, pigment and resin. Technically, solvent ink refers only to the oil-based carrier portion of the ink that keeps the other components in liquid form and once applied to a surface through jetting dissolves. Pigments used to produce color in solvent ink are applied in powder form to produce the best quality color and they are adhered to the printing materials by mean s of resin which both makes the color stick and protects it from damage.

Eco-Solvent
Eco-solvent is a form of the non-water based ink that is made from ether extracts taken from refined mineral oil; the cognitive implication of the term “eco” which brings to mind the idea of an ecologically sound product is an inaccurate assumption when applied to this form of solvent ink because neither the material used in making it nor the creation process are ecologically conscious choices. Eco-solvents are also known as soft or mild ink; this form makes the creation of a reliable printer easier because of its slow dry time and the need for multiple heaters in the printer.

Aggressive Solvent
Aggressive solvent Ink, known too by hard or true solvent, is a fast drying form of the ink which uses a quickly absorbing solvent formula, allows prints to be made on surfaces that cannot handle a lot of heat. Aggressive solvent ink is also more scratch resistant and weatherproof than eco-solvent.

Costs
The cost for both the mild and aggressive forms of solvent ink are comparable when purchased in ink cartridges, but manufactures of printers made for use with the aggressive form have made bulk ink insert options that overtime save on ink costs in order to offset the fact that aggressive ink printers use 10 percent more ink than mild ink printers.

UV INKS
A type of radiation-curing ink that dries, or “sets,” with the application of ultraviolet light. UV curing ink vehicles are composed of fluid oligomers (small polymers), monomers (light-weight molecules that bind together to form polymers), and initiators that, when exposed to ultraviolet radiation, release free radicals (extremely reactive atoms or molecules that can destabilize other atoms or molecules and start rapid chain reactions) that cause the polymerization of the vehicle, which hardens to a dry ink film containing the pigment. UV curing inks are designed to replace heatset inks whose solvents emit potentially toxic gaseous emissions. However, UV curing inks are as much as three times the cost of regular heatset inks, and are used only in specialty printing, such as liquor cartons, cosmetic packaging, metal decoration, screen printing, and flexography.

The most common configuration of UV curing equipment is a mercury vapor lamp. Within a quartz glass tube containing charged mercury, energy is added, and the mercury is vaporized and ionized. As a result of the vaporization and ionization, the high-energy free-for-all of mercury atoms, ions, and free electrons results in excited states of many of the mercury atoms and ions. As they settle back down to their ground state, radiation is emitted. By controlling the pressure that exists in the lamp, the wavelength of the radiation that is emitted can be somewhat accurately controlled, the goal being of course to ensure that much of the radiation that is emitted falls in the ultraviolet portion of the spectrum, and at wavelengths that will be effective for ink curing. UV radiation with wavelengths of 365:366 nanometers provides the proper amount of penetration into the wet ink film to effect drying. (See Photo-Reactive Vehicle.) A newer variation of radiation curing inks, Electron Beam (EB) Curing Inks, have some advantages over UV curing inks, but although the formulation of the inks is less expensive, the EB curing equipment is more expensive.

Latex inks
Up until recently, HP had the exclusive patent for latex inks. However, Mimaki’s latex ink, launched just before FESPA Digital 2012, has significantly opened up this market space. This new development could see even more manufacturers creating new latex ink technologies in the near future.

Latex inks produce odourless and high quality prints across a wide range of media, delivering eye-catching indoor and outdoor applications. Latex inks are scratch and water resistant and can print on low cost and uncoated substrates, such as paper and polyester. Wall coverings, POP displays, soft signage, posters and banners are just a few examples of what it’s possible to achieve with these inks.

There’s no need for an air purification system, because latex inks emit extremely low levels of VOCs. This process evaporates the ink system and causes the latex polymer particles to form a continuous polymer layer that adheres to the print media and create a durable colourant film.

Water is a major component of latex inks, offering benefits to production environments because it doesn’t require special handling and is not toxic, flammable or combustible. Latex inks are positioned as a viable and eco-friendly alternative to solvent and eco-solvent inks. They provide many of the benefits of solvent-ink technology—such as outdoor durability—without imposing the typical environmental, health, and safety restrictions.

Mimaki’s latex ink is an aqueous, odourless resin based technology which has reasonable sustainability credentials. Their latex inks boast similar features and environmental advantages to HP inks. They also have the additional benefit of white ink to the traditional four colour process. The white ink increases the spectrum of applications and provides more versatility, with the flexibility to print on a wide range of media including transparent PET, window decoration and shatterproof window film.

As the above demonstrates, print technology is a complex topic, and one that a single feature cannot explain fully.  We are in the process of building a “knowledge bank” of backgrounders to help you increase your understanding of an area that is going to remain fundamental to PSPs’ drive for increased profit and productivity.

We live in exciting times in the world of print technology. The innovation we are seeing is transforming the way we do business. The opportunities to expand into new areas by providing customers with product solutions, is a real possibility.

Urban Design and Print supports digital demand with Horizon and Foliant buys

Commercial printer Urban Design and Print has invested in a Horizon SPF/FC-200 bookletmaker and B3 Foliant Vega 400 laminator to support demand for its digital print work.

The Horizon SPF/FC-200 bookletmaker is suitable for digital short-run work

The machines, which the Southend-on-Sea firm bought from Intelligent Finishing Systems (IFS), were installed in November.

“We have had a Kodak NexPress for three years and interest in digital short-run work is increasing,” said managing director Jeff Chaplin.

“We have a Muller Martini saddlestitcher, but it’s not practical for small runs of around 50 or a couple of hundred so we needed something to handle the faster turnaround shorter run digital jobs more efficiently and cost effectively.”

The firm chose the 4,500bph Horizon SPF/FC-200 as it is JDF-ready and offers instant set-ups via a large icon-based colour touchscreen. The screen can be used for on-the-run fine tune adjustments as well as storage and recall of up to 200 jobs.

“We had been looking around for a while at what was on the market but liked the Horizon for a number of reasons. One of the main ones being that it takes a flat sheet and turns it into a booklet; there is no separate folding,” said Chaplin.

“Manually this would have taken us time before, now the jobs can be completed so much faster. This saves us time and frees up staff to work on other jobs. It is quick, easy to use and does everything we wanted it to do.”

The B3 Foliant Vega 400 laminator, which is capable of 18mpm, was added to replace a hand-fed laminator.

“This was a much faster decision and a no brainer. We saw it in operation at Print Efficiently and it is quick and cost-effective. Now a job that was taking half a day takes just an hour or so,” said Chaplin.

“Both investments were about increasing automation to improve throughput and production speed. This makes the whole operation much smoother and enables us to profitably take on more short-run work.”

“I’ve looked at a few other alternatives in the past but I was quite happy with the deal that IFS did for me on both machines and I’ve bought other equipment from the company in the past and been pleased with it. The Horizon kit has a good name and I don’t want to have to replace the equipment any time soon.”

Urban Design and Print also operates two five-colour Heidelberg Speedmaster presses; a 72 and a 74, Xerox digital kit, an Agfa Anapurna UV flatbed and Roland and Epson wide-format machinery.

The firm, which employs 30 staff and has a turnover of £3m, produces a wide variety of print including posters, flyers, leaflets, banners, stationery and business cards for clients ranging from local businesses to blue chip companies.

5 Important steps in direct to t-shirt printer maintenance

With digital direct  to t-shirt printers rapidly becoming common place in the printing industry, it is important that we educate ourselves on the proper maintenance of these machines. It is critical to your business that your printer be routinely maintained to assure its productive life and longevity. Direct to garment printers such as the Brotherjet BR-TX1800/TX4880 have evolved in just a few short years from a category of machines that were un-proven, to being recognized as very productive printers which require minor regular maintenance. Ahead are 5 important steps in direct-to-garment maintenance to assure that your printer continues to be a money making machine.
Nozzle Check

Without nozzle checks, you have no visual indication whether or not all nozzles are firing. A solid pattern will indicate that your print head health and performance is optimal. A fragmented or broken pattern or even a missing pattern will indicate nozzles that are not firing. Make performing a nozzle check part of your daily routine, even if you do not have print jobs scheduled. If you discover that you do have misfiring nozzles, this must be addressed immediately with a print head clean. Missing nozzles will not get better as time passes so you must be proactive and perform print head cleanings at the first sign of missing nozzles. If daily nozzle checks continue with poor results, the issues outlined below may be of concern.
Environmental Control
The two environmental conditions that must be monitored are humidity, and temperature. Because your printer uses water based ink, there are optimal levels that must be achieved in order to get the best ink flow and print quality. Humidity levels must be above 45 percent. Gauging these levels can be done by using a hygrometer that you can purchase at any home improvement store, or even a pet store. This device should be mounted on, or close to your printer. Regardless of the humidity in your region, indoor environment is much different due to many factors. Air conditioners and heaters will dry out the air indoors. In order to counteract this and control the humidity you may need to purchase a humidifier and place it near your printer. Temperatures should be 61° F to 90° F. Higher temperatures can make your ink thin and runny, where cold temperatures can make your ink thick and sluggish. Also consider that controlling the environmental conditions in larger rooms will be much more difficult than in smaller enclosed environments.
Ink Flow
Your dtg printer is much like your own body. Just as your body has blood flowing through your veins to keep you alive, your printer must have ink flowing through it to keep it working. If ink is not flowing, it will become stagnant and eventually clog your system. Clogging can happen only within a few days of non use. One of the best ways to keep the ink flowing through you printer is by simply printing a few sample shirts on a daily basis. The sample shirts will not only keep the ink flowing through your system, but they can also help you promote and generate business leads as you show off the capabilities of your direct-to-garment printer.
Maintenance/Capping Station

The maintenance/capping station performs two jobs in maintaining the health of your print head. First, it creates a vacuum seal around the print head nozzle plate to pull ink through using the pump inside the station. The pressure from this vacuum helps keep nozzles clear from drying ink. The second job of the station is to clean the print head via its wiper blade. The wiper blade swipes across the print head nozzle plate to keep it clean. On a weekly basis you will need to clean the area where the print head rests while not in use. Over time you will see a buildup of dried ink that will cause the vacuum seal to become less effective. An unwanted consequence of a broken seal is that it is now exposing the maintenance station to air, which will eventually dry out the nozzle plate. The loss of the seal can also make the function of the pump during print head cleanings less effective. Also, make sure to clean the wiper blade on a regular basis. A clean wiper blade assures a clean wipe of the nozzle plate during print head cleans. A dirty wiper blade will leave streaks and unclean areas on your nozzle plate. A simple clue to recognizing a dirty wiper blade is its appearance. A shiny wiper blade indicates that it needs to be cleaned as that shine is actually a skin of dried up ink that needs to be peeled off. Once cleaned, it will take on a dull rubber appearance.
Flushing with Cleaning Fluid
Cleaning fluid is needed to flush the entire ink delivery system on a monthly basis and to prevent clogging when not in use. This is especially true if white ink has been loaded into your printer. How long ink can sit inside your printer without needing to be flushed out is dependent on manufacture specifications. Brotherjet recommends that its users flush ink out from their system if the printer is to be left idle for more than 3 days. Please read your user manuals on this procedure as each manufacturer’s suggested maintenance will be different. To verify that the ink has been flushed out completely, perform a print purge or nozzle check and look for any visible ink. Perform purges until you see only clear fluid. Flushing your printer on a monthly basis can break-up small amounts of ink that may have accumulated in your ink tubes and print head. Flush the ink and let the cleaning fluid sit over night.

Following these 5 important steps will keep your garment printer in optimum condition. It is important to get into the habit of performing these basic maintenance procedures. Maintenance is critical to ensure success of your business, and the well being of your direct to t-shirt printer. Depending on how often you maintain your printer, print head life can vary from as little as a few days to well over a year. These steps take very little time, effort, and money. This will assure a happy printer, and a happy printer owner.

Troubleshooting of Communication Error – The printer does not operate at Connect printer

Check Point

1. Check that the Connector Cable of the Power Supply Board is connected to the Main Board Connector CN7.
Connect the Connector Cable of the Power Supply Board to the Main Board Connector CN7.

2. Check that the blue colored pin of the Power Supply Board Connector cable is inserted into the 1 Pin of the Main Board Connector CN7 as shown in the above picture.
Reconnect the Power Supply Board Connector cable so that the blue colored pin is inserted into the 1 Pin.

3. Check that the Fuse F1 on the Power Supply Board has not blown.
Replace the Power Supply Board with a new one.
power supply fuse f1

4. Check the components on the Power Supply Board for damage.
Replace the BR-1800 Power Supply Board with a new one.

Choosing the right small flatbed printer for your business

In the first of two articles on small format flatbed inkjets, Simon Eccles looks at the uses of these devices, plus offerings from the biggest players.

Small format flatbed inkjet printers have distinct character and range of special applications of their own in a way that you don’t see with, say, the narrowest versions of solvent roll fed printers.

The compact dimensions of the smallest A3 bed models means they’ll fit into places where you wouldn’t put a wide format printer, and the relatively low entry prices mean that they’re attracting the sort of user that can’t accommodate or perhaps can’t afford a “conventional” flatbed.

Just as more importantly, these baby flatbeds are built to take deep, often three dimensional objects that are located on the beds by vacuum and jigs.

This materials handling ability more than anything else is driving the applications, which include objects such as phone and tablet cases, laptop lids, leather folder, book and iPad covers, pens, USB sticks, golf balls, plaques, ceramic tiles and plates, trophies and office nameplates. For more industrial purposes, the printers can be used for backlit instrument panels, touch switch panels, component marking and the like.

They will print on anything that’s relatively small and solid, really. Most of these small printers use UV-cured inks, which sticks to many surfaces, while some (such as Mimaki) can optionally print a primer fluid that increases the range of substrates that can be handled. Copytrax offers both strong solvent and water-based gel inks as well as UV curing.

Modest curves can be printed on, but not anything with a significant variation in height as the accurate “throw distance” of the ink droplets is relatively small, as with any inkjet. For example golf balls can only be printed in a fairly small circle around the highest point, and not the whole of one hemisphere.

All this class of small flatbeds have vacuum beds, but if you’re printing multiple small 3D objects you’ll need a jig to hold them in predetermined positions, so the printed image is applied to the right areas. Jigs can be made from wood, foam, metal or Perspex.

The jig is linked to the design system or Rip through simple templates that position the artwork objects to align with the physical jigs. Mimaki demonstrated a jig-free camera based position locator and automatic registration system at drupa 2012, but hasn’t released it as a production system so far.

What’s available?
The FESPA Digital event in Munich this year saw the latest arrival to the baby flatbed party. Mutoh announced its ValueJet 426UF, a keenly priced A3+ flatbed printer that fills a gap in its range where it couldn’t previously compete with its fellow Japanese rivals Mimaki and Roland DG.

This new model is due to ship in September 2014 and we’ll look at it in more detail in part two, together with the equally interesting products offered by some of the smaller European developers: Copytrax/Azon and Bergstein.

Mimaki_UJF-3042FX_with_jig_EDIT

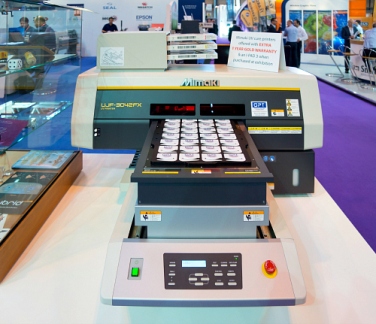
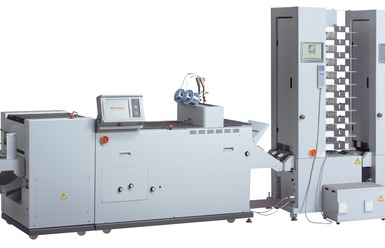
This Mimaki UJF-3042FX has a jig on its bed to position small gift items – in this case paper cutters.

Actually Mutoh has come rather late to the party. Mimaki announced its first A3 flatbed, the UJF-3042, five years ago and has since revised it with a couple of variations as well as an A2 version. Mimaki itself wasn’t the first to build a small format flatbed, as there had been attempts to get small solvent flatbeds off the ground in the early 2000s.

However, Mimaki’s combination of UV inks and LED curing lamps with a deep adjustable-height bed, coupled with its marketing clout, made the UJF-3042 an instant sales success. Priced below €30,000, these printers sold as quickly as Mimaki could make them for the first year or two.

The original Mimaki UJF-3042 was revised and renamed UJF-3042FX in 2011. It takes items up to 50 mm thick and now costs about €21,500 (a drop of about 25% since launch)). In 2011 it was joined by the €38,000 UJF-3042HG, which can accept 150 mm deep objects. An A2 format UJF-6042 was introduced in 2012, for about €50,000.

All models print a maximum of 1,800 dpi and offer CMYK plus light cyan and light magenta and will optionally print a primer coating if needed.

The original UJF-3042 prints either white or clear ink, while the other two can run both in the same unit. There’s a choice of high durability, stretchable or wide gamut inks, and the white has recirculation.

According to Mimaki, the UJF-6042 can print a complete bed in between 2 minutes 30 seconds and 7 minutes 37 seconds depending on the quality settings.

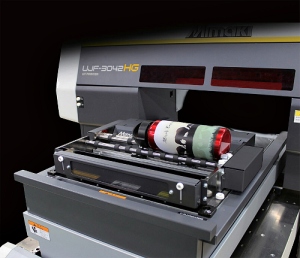
Kebab fits on the deeper beds of the Mimaki UJF-3042HG and the UJF-6042 and includes motors to rotate cylindrical items.

In some markets Mimaki offers optional “Kebab” holders for the deep-bed UJF-3043HG and UJF-6042 that can rotate cylindrical objects such as wine bottles, candles or cardboard tubes under the heads. Cost is about €3,800 and it takes objects from 10 to 110mm diameter and up to 330 mm long.

Mimaki_Kebab_EDIT

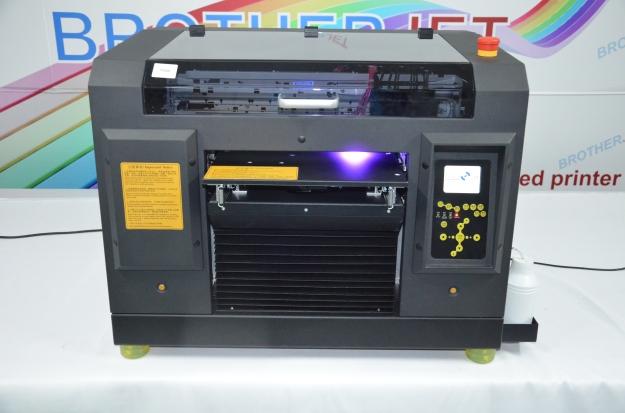
Brotherjet BR-U1800 a3 desktop uv led flatbed printer
Brotherjet UV LED inkjet printing system does not have to be very expensive and big size. BrotherJet Inkjet UV LED flatbed printers have breakthrough in technology in terms of sizes, cost and durability, more and more ordinaries can own it to bloom their business. BrotherJet launched the BR-U1800 smallest A3 desktop UV LED printer with the advanced BRUVD4 UV curing inks which is refillable with CISS ink systems in lowest production cost. Utilizing the BrotherJet RIP and optional ArtisRIP, you can print the dark world by opaque white ink and vibrant, full color images. Omnipotent UV led ink offers unlimited printing possibilities of varietal materials covering from:Metal, wood, plastic, acrylic, ABS, bamboo, aluminum, ceramic tiles, glass and to more and more. BR-U1800’s price considerably: in the world it is now the equivalent of €4000. It is has high performance price than roland and mimaki printer.

Popular applications

promotional items(pen printing, golf printing, card), outdoor signage and home decoration, phone and pad case, awards, giftware, photo image, industrial instrument face, PCB, kids toys, .etc

Lighting features:
1. Photo printing quality. Equipped with EPSON printer head DX5 ,the BR UV direct printing system realize the real photo printing quality with 2880*1440DPI. It has the highest resolution and most exquisite performance. Nothing less than Mimaki-UJF-3042 or Roland LEF-12.

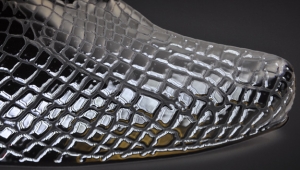
2. Touchable colors: Directly print 3D texture onto any materials, Like acrylic, plastic phone case, ABS, PVC, wood, ceramic, tile, leather, metal, glass, paper, board,ect.. Not only read the color but feel the color by fingers.

3. Ideal printing process: White and color printing simultaneously and seamlessly.

4. Anything to print: Compatible for hard rigid substrates and flexible materials without cracking.

5. Whatever you see, whatever you print: C,M,Y,K four colors produces all colors and gradients of real picture.

6. Unbelievable Low ink cost: refillable CISS ink system saving more than 50% ink cost.

7. LED automatic substrates sensor system avoid the strikes of the printer head.

8. Offer printing ready while waiting service is benefited by the instant dry during the printing.

9. Permanent ink chips avoid frequent resetting.

10. Easy leave: Automatic ink system cleaning by time setting prevent head clog.

12. Longevous machine: Long life of UV lamp up to 10,000 working hours, advanced build quality ensure industrial continuous printing.

12. Quietly working without any noise in working place.

13. Glossy effect: optional varnish/ Clear printing provides glossy effect possibility.
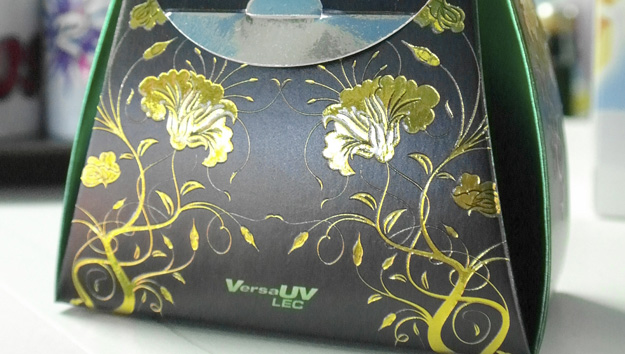
Foil decoration

Foiled metallic effects are popular with personalised giftware, but none of the small flatbeds have metallic inks yet. However at the end of last year I-Sub Digital, a UK based Mimaki dealer, launched Digi-Foil, a range of metallic and decorative foils that have been specially developed for use with the UJF-3042 and 6042 models.

This uses a heated applicator for a largely manual process after initial printing. A special adhesive ink is used in the printer as a separate pass, allowing prototypes, one-offs and short runs of foiled work to be produced without the need for hot foil dies and presses. I-Sub says that the foiled area can be anything “down to a single dot.”


Tiny Roland grows up

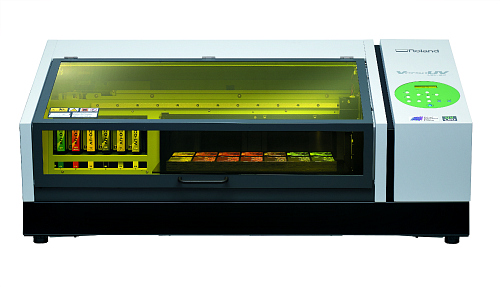
Roland DG’s A3 format LEF-20 was introduced to Europe last year.

Roland DG’s first small UV flatbed was very small indeed. The VersaUV LEF-12 has an A4 printing area. It was initially priced at little less than the larger Mimaki UJF-3042 models, which limited its appeal despite some nice features such as a sealed lid and optional carbon filter to reduce dust and ink mist.

Roland fixed that in 2013 by launching the SRA3 format LEF-20 at a price that briefly undercut the Mimaki at around €25,000, while reducing the LEF-12’s price considerably: in the UK it is now the equivalent of €16,400.

The LEF-20 takes objects up to 100 mm high. It offers CMYK plus white and clear ink, in 220ml cartridges. With both the Roland models there’s a choice of matt or gloss finish when curing the clear coating.

With a maximum 1,440 dpi resolution on the LEF-20, Roland says it takes 7 minutes 20 seconds to print a complete SRA3 bed with CMYK only; or 12 minutes 44 seconds with CMYK plus white; and 17 minutes 20 seconds with CMYK + white + clear.

In Part 2 we’ll look at further options in the baby flatbed category, together with a look at where they fit alongside existing analogue and alternative digital processes.

How to print 3D effect with a UV flatbed printer

The original photopolymer UV inks cured so quickly that they didn’t have time to spread out and form a thin film, so the image areas stood proud of the media. Coarser halftones looked and felt like sandpaper.

Over the years the ink formulations have been refined and techniques such as pinning have reduced this effect to the point that the smarter curing systems can be used to vary the smoothness level between high gloss and matt within the same image.

However, those sandpaper images can be a definite advantage if you exaggerate them. Because UV ink can be cured instantly after printing, it’s relatively easy to print on the same spot to build up layer on layer, giving a raised image that’s obvious to both the eye and to the fingers.

“The raised nature of a UV print – be it clear or process – has allowed tactile signage, or packaging proofs that require a Braille element or any decorative 3D effect to be created by simply printing multiple layers of ink in register,”said Duncan Jefferies, marketing manager for Mimaki’s UK agent Hybrid Services.

Rather like metallic effects, this raised imaging adds perceived value to the print, as the embossed appearance is associated with quality. As we also pointed out, combining metallics with raised ink simulates foil blocking, again a high value effect.

“Raised imaging gives a new effect,”pointed out Nick Decock, commercial marketing manager of Mutoh Europe in Ostend. “The luxury finish is certainly something printers are looking for, as it lets them charge a lot more than for regular work like posters and banners. It can be used for special effects, trophies, prototype packs and cartons – there are lots of possibilities.”

In theory any UV inkjet with a scanning head can do this, providing the Rip and controller are built that way. However, Roland DG was the first to make a big marketing point with this ability in 2008, when it introduced its first VersaUV printer-cutter, the 30 inch roll-fed LEC-300. This was replaced by the faster LEC-330 and the even faster and wider 54 inch LEC-540. It can build up layers of clear ink to form a pattern embossed effect, or it can create textures by using a greyscale image in the artwork file, where dark is “low (ie fewer layers) and white is high (more layers).

The raised layers are set up and controlled by the Rip, in this case Roland’s own VersaRIP which is bundled with all of its printers. Setting up is similar to creating a cutting path for the printer-cutters – a specially named layer is created in the original image file (which is most likely a PDF), which is then detected by the Rip and assigned to the clear ink.

BrotherJet shows off different texture effects using black UV cured ink

According to Jefferies, BrotherJet has been able to produced raised images singe the mid-2000s, although it has never made such a big thing of it as Roland did in 2008. The process is exactly the same as Roland’s building up multiple layers of ink by curing each layer.

The BrotherJet ArtisRIP software enables up to nine layers to be printed automatically to create the raised effect. It claims this requires minimal operator intervention or indeed file setup. By using a greyscale ‘height map’ for the clear layers, variable textures and domed effects can be created. BrotherJet’s UV printers range from the small BR-U1800 and U4880 flatbed models, to the big BR-7880 and BR-9880 flatbeds. these are the new small A3 flatbed BR-U1800 printer.

Mimaki produced this sample of Braille on signage, building up multiple layers of black UV-cured ink

This idea has sometimes been extended into the creative sphere, with raised imaging used for illustrations in Braille books as well as museum and gallery signage and descriptive labels. Using a digital print technology makes this possible for one-offs, temporary signage or short runs at low cost, compared to using metal dies to emboss the images.

Although most people will think of print as a planographic process, meaning its images are flat, metal dies have been used for centuries to add a 3D element to the surface.

Digital printing can now emulate that in ways that would be technically impossible, or too expensive for traditional dies, with the added benefit that there are almost no preparation costs, no special presses, and every copy can be different. The creative potential of raised print is on the up and up.

clear ink to form a pattern embossed effect, or it can create textures by using a greyscale image in the artwork file, where dark is “low (ie fewer layers) and white is high (more layers).